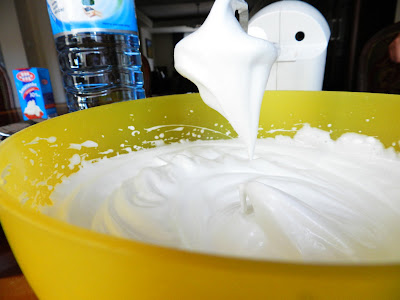
Firstly, to Rachel, thank you for the present. It was awesome! Sorry that I didn't wait to make it during our cooking meetings, but I really couldn't take it any longer.
Okay, what Rachel got me was... magic. PAVLOVA MAGIC.
You might be confused as to why Rachel gave me cake mix, but it's an inside joke. And I'm glad she did, since I have always wanted to try pavlova and never got a chance.
Making it was incredibly easy. I didn't even have to measure anything! But more on that later.
THE INSTRUCTIONS (word by word)
PAVLOVA MAGIC
All you need:
130g caster sugar
140ml water
1. Preheat
Preheat oven to 170 degrees Celsius conventional or 150 degrees Celsius fanforced. Line a 37 x 25 cm baking tray with baking paper.
2. Mix
Fill the bottom of the "plastic egg" with lukewarm water (140ml) and pour into a high-sided large mixing bowl. Carefully add the Pavlova Magic mix and mix on low speed for 15 seconds. Mix on high speed for 4-7 minutes, scraping down the sides of the bowl occasionally, until the mixture is stiff and forms peaks. Switch mixer to the slowest speed. Fill the top of the "plastic egg" with caster sugar (130g) and sprinkle evenly into the mix. Mix on high speed for 1 minute. Pile mixture onto prepared lined tray, shaping it into a high dome shape. Pavlova Magic will spread during baking.
3. Bake
Reduce the oven temperature to 120 degrees Celsius conventional or 100 degrees Celsius fan-forced., place the baking tray on the middle shelf and bake for 1 hour.
4. Rest
Turn off the oven and leave pavlova in the oven until the oven has completely cooled down. Do not open the oven door at any time during the baking or drying process.
Decoration Ideas:
Top with fresh whipped cream and fresh fruit (strawberries, kiwi fruit, banana, passionfruit, raspberries or blueberries), ice cream topping or choc chips or drizzle with liqueur and melted chocolate.
I'm not sure why I copied that all out. I mean, you can't really make it since you don't have the mix, and if you did you'd have the instructions yourself. That was so pointless...
For the first time ever, I actually managed to follow all the steps without tweaking/changing/messing anything up!
Except for once, when I managed to cover my whole camera with the sticky mixture while beating it. At least it didn't get on the lense, but it took ages to wash out.
Back to the not having to measure anything, the whole plastic egg bottom and top thing, I think that's just genius. Just pure genius. Measuring may be the most boring, annoying thing on earth, and they managed to make it easy and fun in the form of a cutesy plastic egg.
HUZZAH for plastic measuring eggs.
Here are a few of the shots:
It collapsed at the end, which was extremely depressing, but it still tasted really good. The top was crunchy and not too sweet like some meringues are, and just melted in your mouth. This was, in my opinion, the better part, and I kept eating it by itself and taking it off, leaving the rest. The bottom bit was also really good, it tasted a bit like a more spongy version of marshmallow fluff.
The whole cake itself tasted gorgeous with cream and fruit, all these different textures and flavours blended together perfectly.
Again, thank you Rachel!
p.s. Milena! Send me the lasagne pictures!


THANK YOU! I don't even know when you posted this you came up tops on my internet search. I bought one of these eggs and for some reason the label/instructions got lost and I had no idea what to do, am making pav for Australia Day tomorrow and you saved my life....well our pav anyway. I'm going to try to make it in the shape and colours of the Aussie flag. I know, I know. And I'm going to follow your blog now too.
ReplyDeleteThank you- I too had misplaced the instructions for the Pavlova Magic and this post came to my saviour.
ReplyDeleteThank you for posting the instructions. My egg instructions were lost too - yes I know crazy when you open the packet and cook, but sometimes....
ReplyDeleteThank you too! Ditto on the above: opened the package, postponed cooking and lost the directions!
ReplyDeleteThere were no instructions for temperature or bake time on my egg :-( Thanks for posting.
ReplyDeleteI haven't even opened mine yet so I'm not sure about instructions. I just wanted to know how long it took to cook without getting out of bed to check. So thank you from me too.
ReplyDeleteHad my egg a while and lost the directions (nosey budding chef-grand kids) Thank you very much I used your directions to make tiny red and white (intentions were there more pink) meringues to top off a Christmas triffel. (No peppermint in pantry). I had so much mixture that I flavoured a third with rosewater and dipped them in melted chocolate as an extra treat. Merry Christmas from Qld Australia.
ReplyDeleteSaved me... Like everyone else lost the instructions.... So not so pointless after all.... Thankx
ReplyDeleteusing 2 eggs what would be the cooking time
ReplyDeleteYour a life saver I lost my instructions!!!
ReplyDelete